


- Three 7" x 4" pieces (the bottom and both ends)
- Two 8" x 4" pieces (the roof)
- Two 4 3/4" x 4" pieces (the sides)
- Dowling for perch (optional)
Before you begin assembling the pieces, take out two of the 7" x 4" pieces. On one of the pieces, cut a 45 degree angle on both sides of one end to form a point (see diagrams below). This forms the shape of the roof. Repeat this process on the other 7" x 4" piece. All of the parts should now be cut and ready for assembly.
| Step 1 - attach the back upright end-piece to the bottom piece (the remaining rectangular 7" x 4" piece). The end-piece should be attached to the top of the bottom piece. | 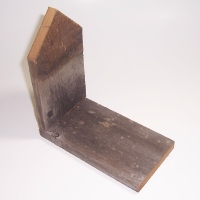 |
| Step 2 - now that one end-piece is attached, position one of the side pieces as shown (with the taller end pointed upwards)and attach it securely against the bottom piece and the end piece. Repeat this process to attach the remaining side piece. | 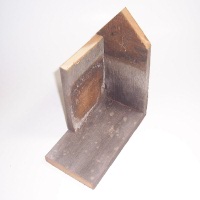 |
| Step 3 - attach the front end-piece as shown in the diagram. | 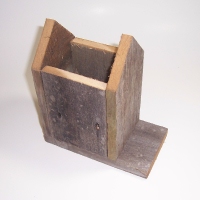 |
| Step 4 - attach one side of the roof as shown. You don't have to split the difference evenly from front to back. I have mine positioned more towards the front (to give the bird more shade on his porch). | 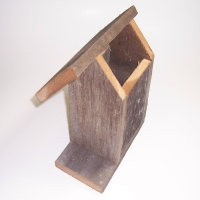 |

Step 5 - attach the remaining roof section as shown in the diagram. Drill a 1 1/4" hole in the front with a paddle-bit.
Paint in bright summery colors. Roof one color and base in a complimentry color. Good job. | <><><><><><><><><><>
No comments:
Post a Comment
Through these open doors you are always welcome