My Blog List

  • CLIMATE CRISIS REPORT - *We now have the clearest picture yet of how different the world is today as a result of human-driven climate change. The most comprehensive report to da...
    2 years ago
  • - *Hello Nee my old friend,* *It's been two years now since I last heard from you. I hope you are well and very happy. I know I became a burden to you wit...
    2 years ago
  • - *YOU are gone from my sight but never from my heart. Rather than mourn your absence, I will be grateful for the friendship that we shared for more than ...
    4 years ago
  • - [image: Image result for animated merry christmas images]
    4 years ago
  • Creamy Dill & Salmon - *Prep/Total Time: 30 min. Makes: 6 servings* *1 salmon fillet (about 2 pounds)* *2 teaspoons lemon-pepper seasoning* *1 teaspoon onion salt* *1 ...
    6 years ago

Monday, January 30, 2012

Old Sweater Teddy

Image for Recycled Sweater Teddy Bear DIY Craft Project
Old Jumper/pullover/ sweat shirt
4 Large Buttons for joints
2 teddy bear eyes or embroidery thread
scissors
needle and thread of sewing machine
toy filling/wadding
Teddy's jumper is optional
Size 18 inch when complete
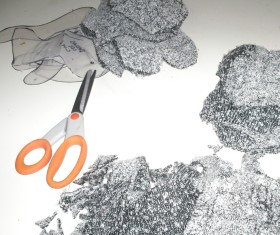
This sewing pattern shows you how to make a teddy bear using a recycled sweat shirt or pullover.
Prepare your sweater by cutting the seems to create a single layer of fabric.
Cut out each pattern piece and lay it down onto your sweater. Cut out each piece. Sew the body first. Sew the bottom darts on both sides then sew the two pieces together. Leave an opening at the top for filling the body.
Legs
Sew two pieces together and leave an opening at the top above the fold , for filling, sew the foot pad into place.
Arms
Sew the two pieces together, leave an opening at the top back edge for filling.
Ears
Sew the two pieces together and leave an opening at the bottom, turn them and sew the bottom by hand.
Head
Sew Gusset to one side of the head, the rounded end goes to the nose, it may be easier if you pin this in place so you get both sides the same.
Before you fill the head, clip 2 teddy bear safety eyes into place. They should be positioned at the beginning of the snout.
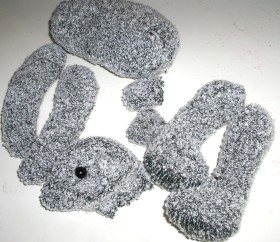
Fill and place ears into position, attach to the head with a blanket stitch, making sure they are secure.
Fill all remaining parts, sew up openings and attach to the body each part with strong cotton and a button for a joint effect.


Granola-Apple Mini Cheesecakes Recipe

Crushed granola bars form the crust for these creamy cheesecake bites, topped with sweet apple.
Prep Time: 25 Mins | Total Time: 45 Mins | Makes: 24


Ingredients:
1 box (210 g) Nature Valley* Crunchy Granola Bars, any flavour
1/4 cup (50 mL) butter or margarine, melted
3 pkgs (each 250 g) light cream cheese, softened
3/4 cup (175 mL) sugar
1 tsp (5 mL) vanilla
3 eggs
1 can (540 mL) apple pie filling
Method:
  • Heat oven to 350°F (180°C). Line 24 regular size muffin cups with foil baking cups. Break 8 granola bars into pieces; place in large resealable food storage plastic bag; seal bag and crush with rolling pin or meat mallet or crush in food processor until fine crumbs form.
  • In medium bowl, mix crumbs and melted butter until well combined. Place scant tablespoon crumb mixture in each foil-lined muffin cup; press in bottom of cup to form crust.
  • In large bowl, beat cream cheese and sugar with electric mixer on medium speed until creamy. Beat in vanilla and eggs until well combined. Cut or break remaining 2 granola bars, into 1/2-inch (1 cm) pieces; stir into cream cheese mixture. Spoon scant 1/4 cup (50 mL) mixture over crust in each cup.
  • Bake for 20 to 25 minutes or until set. Cool in pans on cooling rack 15 minutes. Top each cheesecake with 1 tbsp (15 mL) apple pie filling. Refrigerate until chilled, about 1 hour.
  • To serve, remove cheesecakes from muffin pans. Store in refrigerator.
For this recipe you'll need Oats 'N' Honey Crunchy Granola Bars
Honey & Oats Crunchy Granola Bar
Tip


Make Ahead: Make these mini cheesecakes up to 1 month ahead of time. Refrigerate cheesecakes 1 hour. Place in labelled airtight freezer container and freeze. About 3 hours before serving, place covered cheesecakes in refrigerator to thaw.

Eldorado Paddle Wheeler

This is a simple project when pre-cut pieces are used. Scrap pine can be used for all parts. Start by printing out the diagram. You can scale it to any size but it's best to keep the body width small enough that you can cut it from a 2x4. The boat does not have to be painted but it is best to avoid rust and warpage. Use child safe enamel paints to finish the boat.
Use the diagram to cut out all pieces to the desired sizes. The rudder is optional but it helps the boat steer better. If you are making multiple boats, use a thick stock, such as a 2x4, for the body then resaw it into several 1/2" thick parts. Drill a 1/2" deep 1/4" diameter hole, for the chimney, into the top of the cabin as shown in the drawing. Cut the groove into the paddle pieces. It should be of a width equal to the thickness of the paddles and go half-way through. Drill four pilot holes (slightly smaller than the nail width) for the nails. The chimney is cut from a 1/4" dowel.
Now all your Junior Woodcrafter needs is these six parts, one rubber band, seven 1" finishing nails (two for spares), a hammer, some wood glue, one sheet of 150 grit sandpaper, and safety goggles.
Assembly.
A. Drive two finishing nails, for the cabin, into the bottom of the body where the black dots on the drawings indicate.
B. Drive the nails to the point they are about to go completely through or 'ever so slightly through' the wood.
C. Apply glue to the bottom of the cabin and position it onto the top of the body.
D. Hammer the two nails all the way in.
E. Sand the front edge of the rudder to tapered shape but not quite to a sharp edge.
F. Drive two finishing nails, for the rudder, into the top of the body where the black dots on the drawings indicate.
G. Again, drive the nails to the point they are about to go completely through or 'ever so slightly through' the wood.
H. Apply glue to the top of the rudder and position it onto the bottom of the body.
I. Hammer these two nails all the way in.
J. Place a dab of glue into the hole in the top of the cabin and glue the chimney into place.
K. Test fit the two paddle pieces together and sand to fit if needed.
J. Assemble and glue the two paddle pieces together.
K. Sand all corners and edges round.
L. Place the rubber band over the paddlewheel and hook it into the notches in the rear of the body.
M. Allow all glue and paint to dry overnight.
N. Wind the paddlewheel (backwards) then place it in water and let go.

Click here for a lrager diagram.


Saturday, January 28, 2012

Redneck Dirt Bike


This bike is suitable for young riders. The seat adjustment allows the seat height to be in the range of 340 to 410mm, which should allow youngsters from about two to four years to make use of the bike. The design uses 12mm plywood for the main frame, and hardwood for the front steering assembly.

Designed for safety

 Designing and constructing items for children means safety is of paramount importance. Clear guidance is found in the European Toy Standards EN71, and these rules must be adhered to.
Essentially, the structure must not use hazardous materials, or have features that can cause injury. These standards have been followed in the construction.
The materials used include plywood and hardwood - all edges have been rounded, and finished with a water-based varnish or paint with low volatile organic compound content (VOC).
The timber for the front forks and steering assembly must also be of a very high grade, close grained hardwood. I used mahogany here - this is to ensure that the steering assembly can stand up to the rigours of regular use.
The screws and other fixing items have had waterproof PVA adhesive added to give protection against becoming loose, as well as wood plugs in some places. The outside nuts used have a nylon insert to reduce the risk of loosening. The steering joint has been limited to ensure that it does not become a finger trap - and this can be further limited by adding plastic foam.


Having taken all steps to ensure the bike's safety, it must be stressed that it should only be used while there is a responsible person present, and a safety helmet should be worn by the user. In addition, the structure should have regular checks, and the tightness of any exposed nuts verified.
In addition, the bike is not intended to be used downhill, and is just for children in the correct age range, and being used on the flat.
The main expense when making your bike is the wheels - I've used plastic moulded ones with a diameter of 251mm. They have a hub width of 55mm, and a bore of 12.7mm. The present cost from Hobbies Ltd is £7.60 each. The spindles used for the moulded wheels and the steering spindle make use of a length of M12 studding. The studding is cut to the required length, and the ends rounded. In addition to wood screws, biscuits, adhesive, and nuts and bolts for joining, a cross dowel is used to secure the handlebar to the front steering column for added strength and safety.

Preparation

Step 1
It is very helpful, but not essential, to make a full-scale drawing
Step 2
The advantage of using a full-scale drawing means an accurate template of the main frame pieces is produced. Alternatively, use the information provided to form the template
Step 3
Transfer the shape of the main frame piece on a piece of 12mm plywood
step 4
screw two of these together - first, cut the front at an angle of 12 degrees, and then use a bandsaw or jigsaw to cut out the required shape. Sand smooth, ensuring you take off the sharp edges
Step 5
With the two pieces still screwed together, use a 55mm hole saw to cut two holes - this will slightly lighten the frame, and also allow easier handling
Step 6
Check that the cut shape is accurate by returning to the drawing, if used. Mark and drill holes for the rear wheel spindle, and the seat securing bolts, as well as holes that will attach the front steering bearing
Step 7
Rebate a 12mm wide trench to a depth of 3mm, at the front end of each main frame piece. This will hold the plastic bearing for the steering pivot spindle. Varnish the pieces at a convenient time and use a safe water-based clear varnish, or paint if you want a particular colour

Steering assembly

Step 8
Next, cut the components for the front steering assembly. The top and bottom inserts both require a 12mm hole drilled to take the front steering spindle. Also, drill a 6mm hole from the top of the top insert, and a 10mm hole at the rear to take a cross dowel - this will be used to attach the handle bars later
Step 9
The two front steering uprights are joined to the top insert using size 20 biscuits and screws. The bottom insert is spaced 100mm below the top insert and is attached using screws
Step 10
Before assembling the front steering assembly, round over the outer edges of the uprights using a 25mm round-over bit in a router table. Also, round-over the section that will house the steering spindle. To assemble, first join each upright to the top insert using a single size 20 biscuit, waterproof adhesive, and a 4 x 40mm screw. The bottom insert is attached later
Step 11
For the rear wheel, cut a 145mm length of 12mm studding. Wind plumbers PTFE tape around the centre length of the spindle to fill the thread
Step 12
Feed the spindle through the wheel, with a nut and washer at one end. Place a washer on the other end followed by another M12 nut. Equalise the amount of stud either end
Step 13
Place a further washer on each end, and feed the rear ends of the main frame pieces onto the ends of the spindle - these are held in place using a washer and a nylon insert nut on either end. Adjust the nuts so that the wheel spins freely, and tighten the outer nuts when the assembly is completed
Step 14
Cut a 100mm length of 15mm plastic barrier pipe. The bore needs to be reamed to allow the 12mm spindle to rotate freely. Alternatively, use a length of 15mm copper pipe - the inner bore of this will allow free rotation of the spindle
Step 15
Moving to the front ends of the main frame pieces, run a bead of construction adhesive into the rebate. Place the plastic or copper bearing in the slot. Place the front end of the other main frame piece over the bearing, again with construction adhesive in the slot
Step 16
Secure in place using M6 hex head screws through to the nut inserts. Just tighten enough to hold together at this stage
Step 17
Cut a 170mm length of 12mm studding, or you could use plain steel rod if you have it. Rub candle wax along the part of the rod or studding that will be inside the pipe
Step 18
Insert the front infill just behind the securing screws with adhesive. Drive a couple of panel pins to hold in position. Push the heads below the surface and fill over. Now tighten the securing screws, but make sure that the spindle can still rotate freely. Add two 3 x 30mm screws to the front of the bearing. Use adhesive on the threads
Step 19
Finish the front edges of the main frame pieces by attaching a cover strip using 3 x 16mm screws and adhesive on each side
Step 20
To join the front steering assembly to the main frame pieces, place a washer over the top of the steering spindle, then insert the top of the steering spindle into the hole drilled at the bottom of the top insert
Step 21
Next, place a washer over the bottom of the steering spindle and using the bottom insert, engage the steering spindle into the hole. Push into place and check that the steering swivels freely
Step 22
Use two 4 x 40mm screws through either side of the steering assembly uprights into the sides of the bottom insert. Glue-up the insert and apply glue to the screw threads for extra security
Step 23
Cut a 155mm length of M12 studding, and wind PTFE tape around the centre length. Feed through one leg of the upright with a nut and washer in place, then screw through until the stud appears at the other end of the wheel hub. Fix another washer and a nut, and then continue to screw through so that the stud emerges through the other upright. Equalise and check that the wheel spins freely, then use a washer, and a nylon insert nut at each end, before tightening the whole thing up securely
Step 24
Cut the seat stem attaching blocks - they will require one face to be cut at an angle of 4 degrees
Step 25
Attach the blocks into position using adhesive, and a screw fitted between the two seat stem attaching holes. Drill through the blocks using a 7mm drill and make sure that the holes on both sides align
The seat

Step 26
The next stage is to make the seat. A simple seat can be cut to shape using a bandsaw or a jigsaw. Round-over the top edges of the seat using a 25mm round-over bit in a router table. Sand smooth, and make sure there are no sharp edges
Step 27
Cut the seat stem to shape, and cut matching size 20 jointing biscuit slots to join the bottom of the seat to the top of the stem. Drill the holes for the height adjustment securing bolts into the stem
Step 28
Cut two securing battens, and then join the seat stem to the base of the seat using size 20 biscuits and adhesive. Cut the front angle of the battens at 45 degrees and the rear at an angle of 70 degrees
Step 29Attach the securing battens either side of the stem using screws and adhesive. Align the end of the batten with the rear of the seat. Cover screw heads with wood plugs, and varnish the assembly and/or apply paint
Step 30
Insert the stem into position and align the holes to those drilled in the main frame pieces
Step 31
Feed the M6 bolts through and use a washer and an M6 nylon insert nut to secure each bolt. The height can be adjusted by selecting the appropriate pair of holes
Step 32
The handle bar has a base of pine, and the top has overlay strips of hardwood attached with adhesive. Attach the overlay strips using adhesive, apply weight and leave to set
Step 33
Cut out the rear of the shape with a bandsaw or jigsaw
Step 34
Round-over the hand grips with a 25mm round-over bit in a router table, and ensure all other edges are smooth. Drill the holes for the attaching screws
Step 35
The handlebar can be varnished prior to fitting. The one shown has a cream paint applied to the pine base, then over-varnished. Attach using adhesive, screws and a cross dowel
Step 36
Use a 4 x 45mm screw either side, and cover the screw head with a wood plug. Job done! The finished bike is now ready for action!


The cutting list for the project

additional materials

1. 251mm diameter moulded disc wheels (WDW251) from
Hobbies Ltd
2. M12 studding ; 4 x M12 nuts; 4 x M12 Nylon insert nuts; 12 x M12 washers; 2 x M6 x 80mm coach screws; 2 x M6 nylon insert nuts; 2 x M6 washers; 100mm length of 15mm plastic barrier pipe; cross dowel screws M6 x 50; cross dowel M6 (77320); Insert nuts M6 - all from Screwfix Direct

Kate Middleton : "Hat Person of the Year" !

Kate Middleton has been declared "Hat Person of the Year" by something called The Headwear Association .

In an online poll , the Duchess of Cambridge received an astounding 91% of the vote , beating Rachel Zoe (4%) , Ne-Yo (2%) , and finishers , Justin Timberlake , Bruno Mars and Charlie Sheen .

Middleton joins previous "Hat Person of the Year" recipints , Johnny Depp and Brad Pitt .

Founded in 1908 , The Headwear Association calls itself the 'oldest association' in the hat trade."

When the Duchess of Cambridge looks back on this time in her life , the Duchess will surely remember most fondly her defeat of Charlie Cheen and Rachel Zoe in a hat contest .

Thursday, January 26, 2012

Ask Maxy

DEar Maxy,
In respose to "Democracy Challenged" stated that "everyone hated Obama ." While lots of people do not appreciate President Obama (I'm convinved that for many it is simply because he is only half white) , he is not hated by everyone . He is intelligent , hardworking and creative . He has lived the American dream . He has made his way from lower middle class to the epitome of power and stature . All Americans , with our many ethnic origins , should be in ewe of his achievements . He is 100 percent of what we Americans are supposed to stand for and believe In .
Truth Seeker
Dear Truth Seeker ,
Superlatives always (ha) get people in trouble . Saying that "everybody" does anything is inaccurate , even for the most consistant among us . In this case , using the collective "everyone" to espouse a view about a president is clearly a generalization , and a dangerous one at that . You bring up a point worth considering for those on either side of the po;itical fence ... the unique background of President Obama . It is true that his story is the American dream come true . This may also be why some are so pained by him now .
No human being is a magician . Obama is out president . I reccomend checking out his record of accomplishments to decide if he is fulfilling his promises and your vision of the American dream. I encourage you to look much futher .(www.obamaachievements.org/list) ... also I recommand a nonpartisan organization called Project Vote Smart (www.votesmart.org)
Maxy

Dear Maxy ,
I lost a contract last year with a client who has been very consistent for a long time . Rather than be mad , I would lke very much to get the client back . Do you think it's a good idea to stay in touch ? I sent a holiday card . I thought I also might pitch the client ideas like I used to do . I don't want to become annoying , but I do want the client to remember me . What do you think ?
Persistant
Dear Persistant ,
You are smart to not simply walk away . I'm wondering if you know why you lost the contract . That is an important thing for you to figure out . If your work did not meet the client's expections , you will need to brush up on your skills .
If the client had to cut back due to budget reasons , consider pitching and acknowledging that you are willing to work for less money . Go for it .
Maxy

Dear Maxy,
My husband and I are in our early 50s . We have been married for one year and have not been intimate for six months . Until he transferred to a second shift job , our bedroom was exciting . Now I'm not allowed to touch him . Anything more than a hug and he pushes me away . I missed how we once were . He says he hasn't been feeling well but refuses to see a doctor or counselor .
If he's not willing to discuss this further , it's hard to know what to do or think . I love him dearly , and he tells me he loves me , too , but with all these mixed signals , I'm not so sure . Any ideas?
Beauty
Dear Beauty ,
It's possible the job switch is exhausting for him , or there may be something at work that is making him unwell . Or he could have met someone else on his new shift . There are other possibilities , b ut if he refuses to see a doctor or a counselor , it means he prefers to leave things as they are , and this is unacceptable . Please see a counselor .
Maxy

Monday, January 23, 2012

Woodworking Craft Desk Clock


SUPPLIES
Wood:
cherry—one piece 3/4” x 1-3/8” x 15” (for an outside strip); red cedar—one piece 3/4” x 1-3/8” x 15” (for an outside strip); Colorwood®—one piece 1/8” x 7/8” x 15” (for an accent strip); red oak—one piece 1/8” x 7/8” x 15” (for an accent strip); sassafras—one piece 1/4” x 7/8” x 15” (for an accent strip)
Tools: band saw; jointer; thickness planer; table saw with carbide tipped blade; miter box with carbide tipped blade; drill press with 1-3/8” Forstner bit; disc sander; random orbit sander; palm sander; vise; awl; grinder with buffing wheels with tripoli and white diamond compounds and Carnuba wax
Sandpaper, assorted grits (including 120 and 150 grits)
Superglue (optional - to fill any wood gaps)
Titebond II
Linseed oil/paint thinner mixture (2 to 1)
Aerosol Deft
No. 4/0 steel wool
Flocking material* or adhesive backed felt**
36mm clock face
*Available from: Woodcraft, 560 Airport Industrial Park, P.O. Box 1686, Parkersburg, WV 26102-1686; www.woodcraft.com.
**Available from: Crafts Supplies, USA, 1287 E. 1120 S., Provo, UT 84606; www.woodturnerscatalog.com.

INSTRUCTIONS

Step 1. Begin the process by deciding what species of wood you will use for the two primary strips. For the clock featured here, I chose cherry and red cedar, but there are many other combinations you could choose. Once you decide, square up the two pieces to 7/8” x 1-3/8” x 15”. In addition to the two larger outside pieces, you will need two smaller strips measuring 1/8” x 7/8” x 15” and one measuring 1/4” x 7/8” x 15”. These will become the accent strips on the clock. The 15” blank will yield four clocks.


Step 2. Once all of the pieces are cut to the correct sizes, check to make sure that the grain direction is going the same way in each component (this avoids tear out) and make a witness mark across the blank so you can be sure to have glued it together as planned. I use Titebond II to glue my blanks together.
After the glue cures overnight, remove the clamps and scrape off any excess glue that might have accumulated and dried under the clamps. Try to keep the stock as thick as possible, planing it down flat on both surfaces—be sure not to go below 3/4” thick, however.


Step 3. Select the “good face” of the stock—the one you want the clock face to go on—and mark it. This good face will go DOWN on the table of the saw— assuming, of course, that your blade tilts to the right, like mine.
The bottom edge of the clock must be beveled at about a 13 to 14 degree angle (15 degrees is just too steep—the clock becomes a little unstable and tends to tip over backward). This slight angle allows the clock face to be read easier while it’s sitting on a desktop. I like to sketch this angle on the blank so I won’t get confused when I make the cut.
Step 4. Tilt the blade on the table saw and set the rip fence so you just “kiss” the bottom edge of the blank. Don’t remove any more stock than is absolutely necessary to get a full bevel


Step 5. Match the jointer fence with the angle of the bevel and joint the edge just sawn to remove any saw marks.
Sand both surfaces of the blank before cutting it up into smaller pieces as it is easier and more efficient to sand one large piece than it is to chase four smaller pieces around the bench top. Use a random orbit sander with 120 grit abrasive paper for this. Just remember that this sander is very aggressive, so be careful— especially on the cedar!


Step 6.Because I produce so many of these clocks, I took the time to make a template out of Plexiglas. Plastic is a good choice here because it is durable and rigid. And, because it is transparent, I can see the grain under the template, permitting me to position the pattern to take advantage of the beauty of the wood. I even drilled a small 3/32”-Dia. hole in the template so I wouldn’t have to measure to locate the center hole in each clock face.
Starting from the left side of the blank, trace the template on the stock and mark the center hole with an awl. Flip the pattern over to the other edge and do the same thing, being sure to offset the template enough to avoid overlapping the previous tracing—you have more than enough wood for this.


Step 7. Begin cutting each clock to shape. The first cut is made at 30 degrees and I have found that a miter box saw works best for this. Cut the two angles marked, then retrace the template on the remaining piece and cut it to 30 degrees as well..


Step 8. When I made the prototype for this clock, I just wasn’t comfortable cutting that last angle freehand on my saw. There simply wasn’t enough space between the two fences to support the stock to make the cut safely, so I made a jig to hold the stock in position.
It’s a simple jig. I made it from a piece of scrap plywood and attached a cleat cut at an angle to mate with the bevel on the base of the clock. The jig holds the blank in the proper position, supports the underside of the stock to help prevent splintering, and best of all, allows me to make the cut safer than if I attempted it without the jig.
The top angle on the clock is 90 degrees. Readjust the miter saw to 0 degrees, position the jig as shown on the table of the saw, and make the cut.
Step 9. I use a 36mm clock face which fits securely in a 1-3/8”-Dia. hole drilled 5/16” deep with a Forstner drill bit. A Forstner drill bit works best to drill this large hole because it drills a clean, flat bottomed hole with little chance of any tear out around the perimeter.


Step 10.  Even though I use a carbide tipped blade, the miter saw often leaves coarse mill marks on the wood. They are very difficult to remove while still preserving the sharp, smooth, straight edges required for this project. Therefore, I like to use a disc sander to eliminate the deep scratches and to make the final sanding a little more accurate and a whole lot easier. Just be certain to maintain the original angle and sand down only to the line.

 
Step 11. Use 150 grit abrasive paper and a random orbit sander to do the final sanding on the edges. It’s fast and it does an excellent job with a minimal amount of effort. Again, keep in mind just how aggressive this sander can be and be careful not to oversand.

Step 12. Even though I sanded the surfaces of the blank after planing it down to 3/4”, I take the time to re-sand both surfaces with a small palm sander fitted with 150 grit abrasive paper. Doing so will eliminate any defects, such as pencil marks, scratches or small chips, that might have appeared during the manufacture and prepares the clock for finishing.
When this is completed, use a small piece of 120 grit paper to “break all sharp edges” on the project. Hold the abrasive paper at a slight angle to each edge on the project and make one or two light passes by hand along each sharp edge. This slight rounding over of all edges makes the clock more comfortable to hold.
Finishing Begin the finishing process in the usual manner. Apply a liberal coat of boiled linseed oil thinned 2 to 1 with paint thinner. Let this mixture set for about 15 minutes and then wipe it off thoroughly with a dry cloth. Permit this coat to dry overnight, then apply a couple coats of an aerosol lacquer based finish, such as Deft. I use spray finish on small projects because it’s faster, easier, and does a much better job than I could do with a brush. After the Deft has dried for an hour, rub down the finish with No. 4/0 steel wool.
Finally, buff the clock using three separate wheels charged with three different compounds. The first wheel is loaded with a tripoli compound. It is slightly abrasive and eliminates any tiny scratches that might remain. It also smoothes the wood. A white diamond compound is applied to the second wheel. This removes any excess tripoli and begins the polishing process. The third wheel is charged with Carnuba wax, producing a protective coating while providing the wood with a glossy finish.
The bottom edge of the clock should be covered with some type of scratch preventive coating to protect the surface of the desk or table that the clock will rest on. Besides, it looks a little more professional than if just left bare wood!
I use a flocking material called “Suede-Tex” made by Donjer company. Application is fairly simple. An adhesive undercoating specifically formulated for the product is applied with a small brush and then small fibers of flocking are sprayed over the wet surface with a special applicator gun. The system is quite expensive —especially if you are not going to make a large number of clocks. In this case, I would recommend that you use adhesive backed felt material instead. You simply cut a piece of the felt material larger than the base of the clock, apply it to the base, and then trim it to the exact size with a razor knife.
All that’s left to do to complete the project is to install the clock face. Be very careful when you do so to make sure that the vertical line between the six and twelve on the clock face stays vertical when it is inserted into the hole in the project.
These clocks make excellent gifts for the student going away to college, the office, friends and family, or anyplace else where a little splash of color would brighten the decor.


Scooter - Woodworking Project

scooter made out of wood
Simply Measure, Cut, Drill & Assemble!
This scooter is an example of how something mechanical can be made just by using standard materials that can be purchased from most building supply stores. This project should be undertaken in conjunction with a capable adult. This basic project involves cutting the pieces of wood to length, marking where the holes are to be drilled, drilling the holes and simply bolting the pieces together.


Tools you will need

saw stool Work stool or saw horse carpenters square Set square electric drill Electric drill
spanner Adjustable spanners (2) measuring tape Measuring tape drill piece 1/4" drill bit
screw driver Square point screwdriver carpenters pencil Pencil drill bit 1/2" drill bit
hand saw Sharp handsaw carpenters hammer Hammer

The wood

Wood used in this project is: 1 1/2" x 2" for runner boards, handlebar and handlebar uprights; 2x3 for the neck and a piece of 3/4" plywood for the platform deck. 1 1/2" x 2" wood usually machines (dresses, planes or gauges) down to approx 1 1/4" x 1 1/2".

Pine is a typical wood that can be used for this project. Untreated wood can be used if the scooter is to be stored mainly indoors. If the scooter is to be left outside, choose a wood that has a natural resistance to decay (i.e. doesn't rot easily). Your local lumber supplier can advise you on the best available options. If you cannot purchase wood in the sizes stated above, then near enough will do but remember if the thickness of the wood changes, so must the length of the relevant bolts!

Take notice of the drawings below and then follow the step-by-step instructions that come after. You can also go to helpful stuff for more helpful tips.

Identifying The Parts


Individual pieces


You will also need....
bullet [j] 2 only 1/4" eye bolts 2" long with 5/8" hole and 2 only 1/4" eye bolts 3" long with 5/8" hole. You will need four eye bolts altogether.
bullet [b1] 4 only 1/4" carriage/coach bolts 1 3/4" long with one washer and one nut for each bolt.
bullet [b2] 2 only 1/4" hexagonal head bolts 1 3/4" long with one nut for each bolt.
bullet [b3] 6 only 1/4" carriage/coach bolts 2 3/4" long with one washer and one nut for each bolt.
bullet [b4] 2 only 1/2" carriage/coach bolts 5" long with one washer and one nut for each bolt.
bullet [b5] 1 only 1/2" hexagonal head bolt 6" long with 2 nuts (to lock against each other) and 4 washers. This bolt is for the front axle.
bullet [b6] 1 only 1/2" hexagonal head bolt 6" long with 2 nuts (to lock against each other) and 4 washers. This bolt is for the rear axle.
bullet [b7] 1 only 1/2" carriage/coach bolt 8" long with 2 nuts (to lock against each other). This bolt goes thru the eyes of the eye bolts and acts as a steering pin.


The instructions

If all the holes are drilled in the right place, The scooter should be a piece of cake to assemble.
Please note: If any of the parts or members you have obtained to use in this project vary in size from the parts listed, then adjustments may possibly be required to bolt lengths and other measurements.

1 Measure, cut, drill and lay out
Cut all the pieces of wood to the lengths as shown in the previous page. Carefully measure and mark the center of where all the holes are to be drilled. Next, drill the holes.

Note that there are two different hole sizes.
The holes for the axle bolts and for the bolts that fasten the runners [a] to the neck [c] are 1/2" holes. All the other holes are 1/4" diameter.

Lay all the pieces out on the floor.
lay out the scooter parts
2 Assemble the handlebar
Bolt the two angle brackets [i] to the top of the steering upright [e]. Then bolt the handlebar [f] in place.

Use the picture for reference.

(  I think the handlebar could be made a bit more user friendly....Just a thought....The Genie)
lay out the scooter handle bar pieces
3 Assemble the front wheels
Assemble the front wheels using a 1/2" bolt as the axle. Place a washer on each side of each wheel and making sure that the axle assembly is loose enough to allow the wheels to turn freely, use two nuts tightened against each other to form 'lock nuts'.
This will ensure that the axle assembly does not vibrate loose with constant movement.

Also place two eye bolts in the appropriate holes in the steering upright [e].
the scooter front wheel assembly
4 Assemble the platform frame
Bolt the two runners [a] to the neck [c].

Place the remaining two eye bolts in the appropriate holes in t
5 Add the deck
Fasten the deck [d] to the two runners [a] with 6 carriage/coach bolts. he neck [c].
the scooter platform assembly
Use the picture for reference. assemble the scooter platform
the instructions (continued)

6 Attach the steering assembly
Line up the eye of the eye bolts in the neck [c] with the eye of the eye bolts in the steering upright [e].

Thread a 1/2" carriage/coach bolt through the eyes of the eye bolts to act as a steering pin.
Make sure that the steering assembly can turn freely and then tighten two nuts together at the end of the carriage/coach bolt to form 'lock nuts'. This will ensure that the steering pin does not fall out or vibrate loose with constant movement.
the scooter steering assembly
7 Secure the neck
Fasten an angle bracket to the neck [c] and the deck [d] with screws.

8 Assemble the rear wheel
Assemble the rear wheel in the same way as for the front wheels in step 3. This is purely to increase strength.
the scooter neck assembly
Make sure that there is a washer each side of the wheel and also that the wheel can rotate freely, before applying 'lock nuts' at the end of the bolt.

9 Add the brakes
Screw a T-hinge to the rear of the deck [d].
This is the brake.

scooter rear wheel assembly

Finished!
NOW!
Read below for some scooter safety stuff.
scooter brake assembly
scooter made out of wood

Some scooter safety stuff

ALWAYS use a helmet, knee pads, and elbow pads.
This is a small investment and can instantly eliminate almost two-thirds of possible scooter accidents.

Children under eight should always be supervised when using scooters.
Almost a third of all scooter-related injuries and accidents involve children under the age of eight. As everyone knows, scooters are capable of traveling very quickly, and children that age do not always have the judgment or coordination to handle these high speeds.

Use scooters in a safe places.
Cars and scooters don't mix, especially for younger riders. Smooth, paved surfaces are best - avoid bumpy, uneven, wet or rocky surfaces. School yards, parks, paved trails are examples of safe places to "scoot"!