My Blog List

Wednesday, March 14, 2012

Funny Bunnies for Easter

2ladus

 Choose your fabric,cut out the pieces
easter_ladu02

Simple Easter Bunny:
When you want to stitch the face of your bunny on a fabric it’s good to iron some interfacing on the inner side of the fabric:
easter_ladu03
Now make your little bunny a unique face – maybe some cute cheeks, maybe Miffy-like pout. Whatever your like. And you could give your bunny a heart now :-)
easter_bunny04fh11
Before you sew the front and back of your bunny together, you serge the bottom of the bunny – where you will close it later with a blind stitch. And then: pin the front and the back together – of course the outside in. Sew the parts together and cut the parts between the ears and on the neck. Then serge everything:
easter_bunny05fh11
And now the most exciting part comes: Turn your bunny inside out!
easter_bunny06
That’s it! Now you fill your bunny with doll wadding, use a shop stick for the ears and close your new friend with a blind stitch.
This cute bunny is perfect for Easter decoration – but it’s also perfect as a toy for babies. It’s perfect for little hands to grab it. And it gets even more exciting for babies when you put a rattle in the bunny tummy.
 I sewed two ribbons between the ears to tie them to a baby bed. And I filled the bunny tummy with lavender which has a very positive impact on babies. And you can even put a musical box inside this bunny and make it a wonderful and unique musical cuddly toy.
OK, that was really easy. Now try the other version.
Easter Bunny Toy:
Use the same pattern as before for the body and cut the arm and legs pattern as well. If you want a felt face – cut that one too.
Sew the felt face on the bunny – of your machine doesn’t have that special quilt stitch you can as well use a zic zac stitch or whatever you like. Then stitch the cute face just the way you like it. If you don’t want a smiling mouth – the Miffy-like mouth looks also super cute on a felt face.
easter_ladu06
easter_bunny07
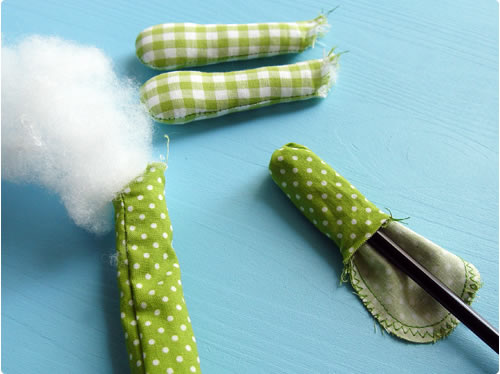
Now pin the the arms and legs outside in, sew them together, serge the edges, turn them inside out and will them with doll wadding. Use a shop stick to reach all parts of the arms and legs.
easter_bunny08
easter_bunny09
OK, now it’s getting serious :-)
Some handcrafters pin now already everything together: the front and back of the body together with the arms and the legs. That’s fine but I don’t do it that way.
First I serge the edges where I will close the body later with a blind stitch. Then I mark with a vanishing pen the points where I want my arms and legs.
easter_bunny10
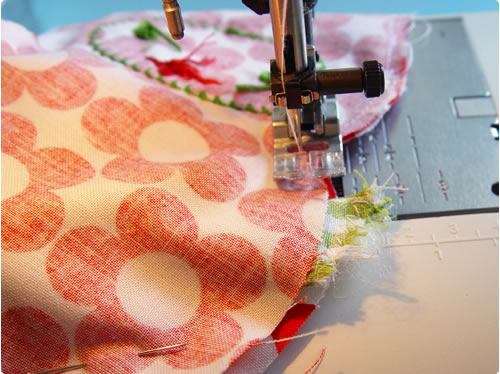
I pin front and back of the body together, insert the first arm and – start sewing. I insert the other arm short before I come to the point which I marked.
easter_bunny11
easter_bunny12
The same with the legs. Then I cut the parts between the ears and on the neck and serge the edges of the bunnie’s body with a zic zac stitch. This fixes the armes and legs additional – so brutal little kids won’t be able to amputate arms or legs from the cute bunny (well, as long as they are not TOO brutal :-) ).
easter_bunny13
Now again the exciting moment: Turning your new friend inside out.
easter_ladu14
Now you are almost finished. You only have to fill your bunny with wadding, close it with a blind stitch – and that’s it!
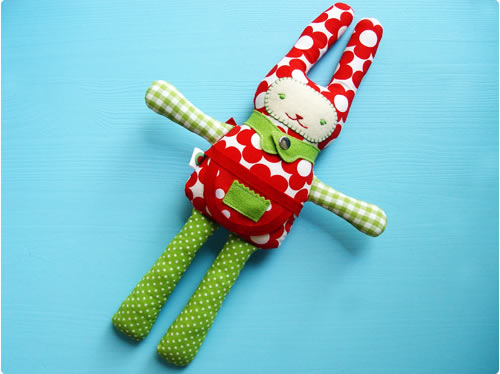
And when you really love your bunny – you make it some cute accessories – maybe a scarf? Or a felt collar like I did. If it’s a bunny boy, I’m sure he would like to have some nice pants. Or if it’s a bunny girl – what about a cute skirt? Or an apron? I’m sure there are many things that come to your mind :-)
easterladu_small
easterladu02_small
easterladu03_small

No comments:

Post a Comment

Through these open doors you are always welcome