My Blog List

  • - * It's been five years since I have heard from you my friend. You are often on my mind and always in my heart. Wherever you are, I hope you are safe, hea...
    6 months ago
  • CLIMATE CRISIS REPORT - *We now have the clearest picture yet of how different the world is today as a result of human-driven climate change. The most comprehensive report to da...
    3 years ago
  • - *Hello Nee my old friend,* *It's been two years now since I last heard from you. I hope you are well and very happy. I know I became a burden to you wit...
    3 years ago
  • - [image: Image result for animated merry christmas images]
    4 years ago
  • Creamy Dill & Salmon - *Prep/Total Time: 30 min. Makes: 6 servings* *1 salmon fillet (about 2 pounds)* *2 teaspoons lemon-pepper seasoning* *1 teaspoon onion salt* *1 ...
    6 years ago

Monday, October 1, 2012

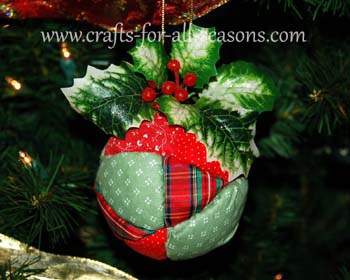
Quilted Tree Decoration

quilted ball ornament
 
This quilted ball ornament is made from a foam ball and scraps of various holiday fabric. The fabric is pushed into the foam at the edges, which creates a quilted, or "puffy" look to the ornament. It almost looks as it is stuffed with fiberfill. These do not take very long to make, the end result is very impressive. These would be good to make for a Christmas craft fair. Just buying a 1/4 yard of various fabrics would make several ornaments, making this an inexpensive craft.
z-
Things Needed for this Christmas Craft Idea:
  • 3.5 inch foam ball
  • Various scraps of small Christmas fabric
  • Scissors
  • Tool for pushing fabric into foam, such as a cuticle stick for your nails (I used a blunt blade used for polymer clay, which worked perfect)
  • Paper clip
  • Wire cutters
  • Ribbon or cord for hanging
  • Small amount of silk holly for top (optional)
  • sequins or beads (optional)

z-google2.shtm
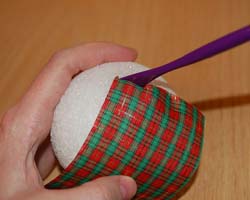
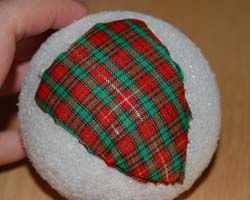
1. Begin the quilted ball ornament by cutting a small triangle of fabric. Gently push the edge of the fabric deeply into the foam ball to secure it to the ball. No glue should be necessary, just pushing it in should keep it nice and secure. Trim the edges that hang out if necessary, and push any excess fabric into the groove you are making. Do this around all three sides.
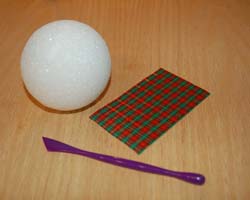
things neededpushing in the fabric with tool

fabric

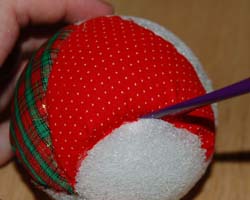
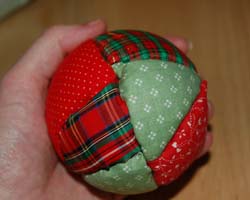
2. Continue by adding a different pattern of fabric next to the piece you just secured. Push the adjoining edge of fabric into the same groove you made for the first piece of fabric. Continue along until the entire ball is covered. See the photos below for help.
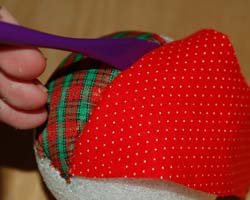
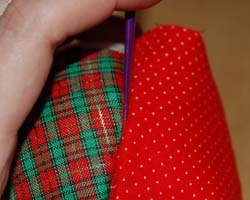
fabric being addedtwo pieces added

fabric quiltingfinished quilting


3. To make a loop for hanging, cut a paper clip loop with some wire cutters. This loop can be wedged tightly into one of the grooves you made. Be sure to add a cord for hanging into the loop before actually pushing it firmly into the ball.
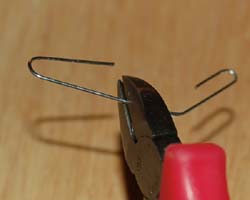
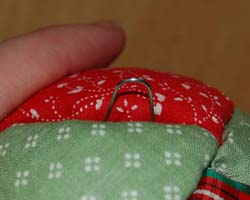
cutting paper clipadding loop
4. Add some silk holly at the top, if desired. Stud with beads or sequins or just leave plain. The ornament is now ready to give away as a gift or to hang on your tree!

Quilted Christmas ornament

No comments:

Post a Comment

Through these open doors you are always welcome