


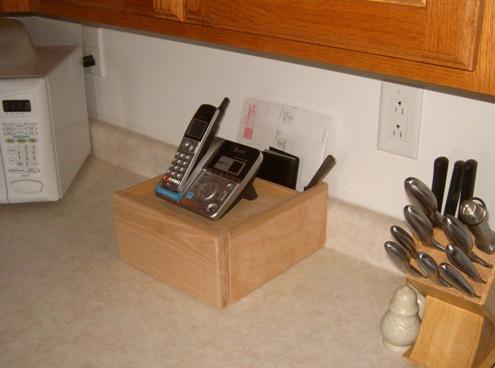
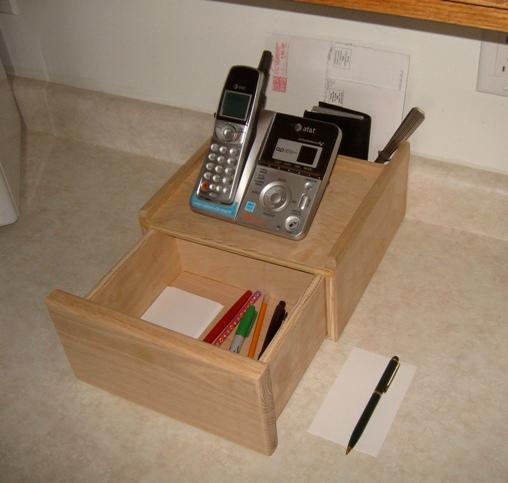
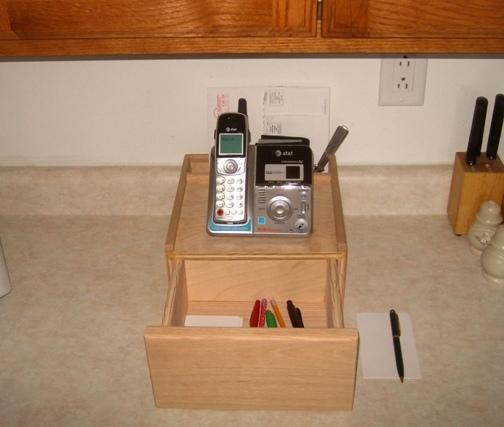
With the right plans, materials, and equipment, you can build a Telephone Caddy, as shown here.
Materials:
- 1/2" x 2' x 2' Oak (or other hardwood) Plywood: One Piece for the Caddy Top Surface and the Drawer Sides
- 1/4" x 2' x 2' Oak (or other hardwood) Plywood: One Piece for the Caddy and Drawer Bottom Panels
- 1/2" x 6" x 6' Solid Oak Material: One piece for the Caddy pieces and Drawer Front
- 1" Wood Screws: Two
- Sandpaper
- Wood Filler and Glue
- Satin Finish Polyurethane Poly
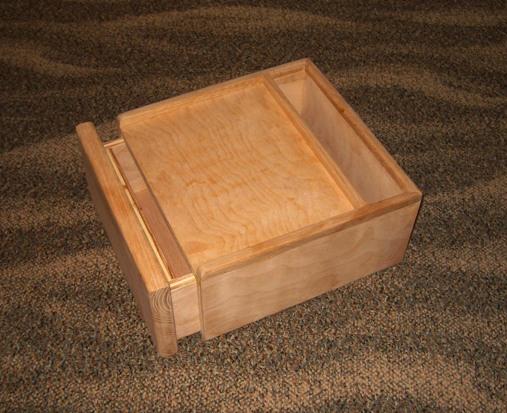
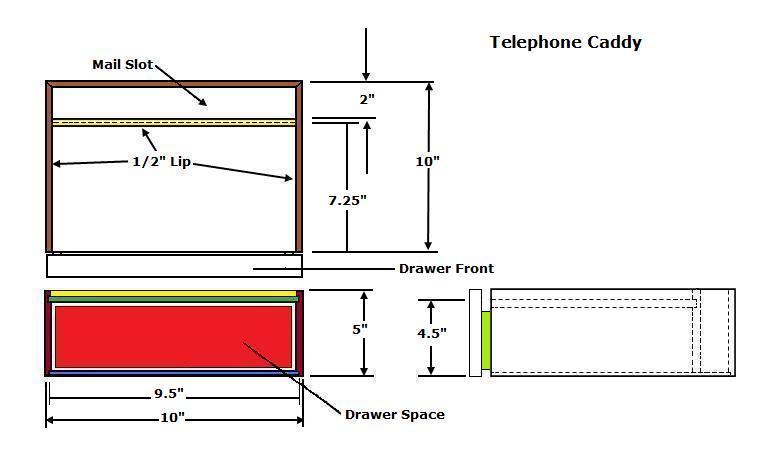
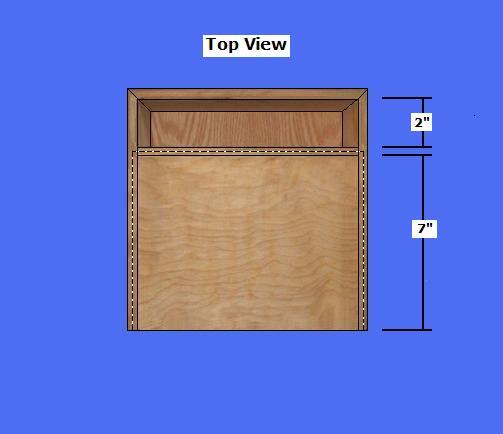
Step 1:Cut and Assemble The Caddy Box Pieces - Determine the desired size of the Caddy or use the dimensions here
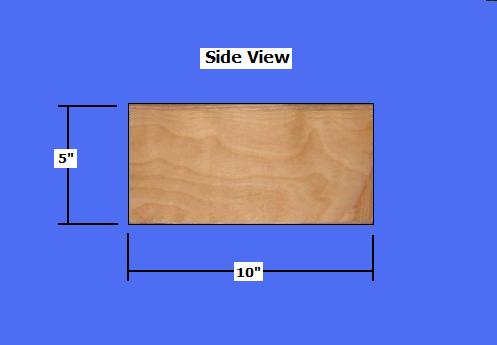
- Select the 1/2" x 6" Oak Material; Rip it to 5"; use the dimensions above to cut the three sides
- Select the three sides; Cut the 45 degree corners, as shown above
- Select the three sides; Dado a 1/4" x 1/4" deep slot along the bottom edges to receive the 1/4" Bottom Panel
- Select the three sides; Dado a 1/2" x 1/4" deep slot 1/2" from the Top Edges to receive the 1/2" Top Panel
- Select the 1/2" x 6" Oak Material; Cut a piece @ 4.75" x 9" for the Mail Slot Partition; Dado a 1/2" x 1/4" deep slot 1/2" from the Top Edge to receive the 1/2" Top Panel
- Select the 1/2" Plywood; Cut a Top Panel @ 9.5" x 7.25"
- Select the pieces; Dry fit the pieces; 1. Glue the three Sides and the Bottom Panel; 2. Glue the Top Panel and Mail Slot Partition (use a 2" space block when completing the assembly); Use a few brads at the edges to secure the assembly

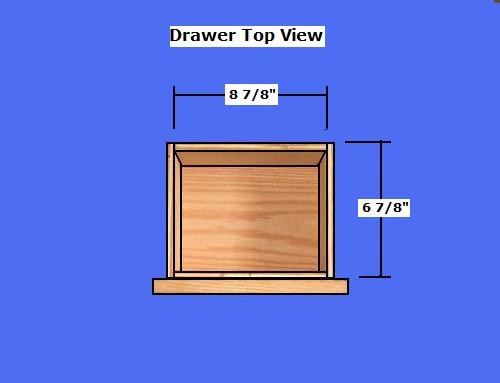
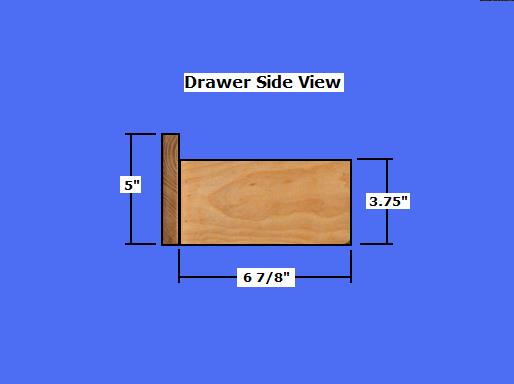
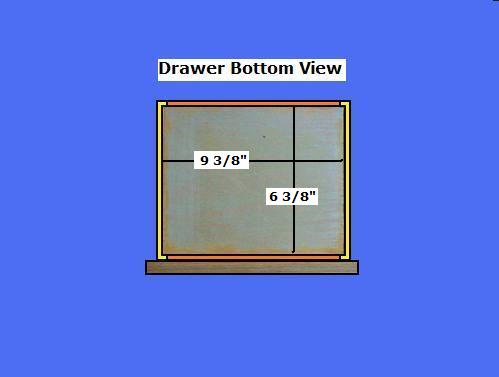
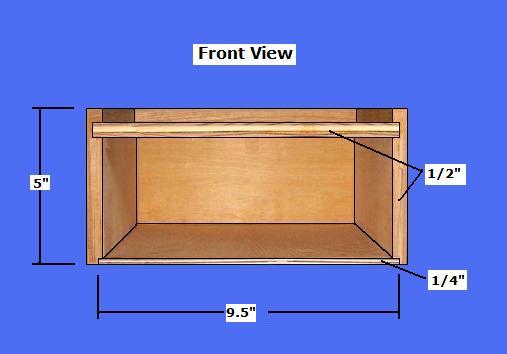
Step 2:Cut and Assemble the Drawer - Select the Oak Material and Plywood
- Select the Oak Material; Cut one piece @ 5" x 10" for the Drawer Front Panel
- Select the 1/2" Plywood; Rip it to 3 3/4"; Crosscut two pieces @ 6 7/8" and two pieces @ 8 7/8"
- Select the four, Plywood Drawer Sides; Dado a 1/4" x 1/4" deep slot along the bottom edges to receive the 1/4" Bottom Panel
- Select the 1/4" Plywood; Cut the Bottom Panel @ 9 3/8" x 6 3/8"
- Select the Drawer Pieces; Dry fit the pieces; Assemble the Drawer with glue and brads, as shown above
- Select the 5" x 10" Oak Drawer Front Panel; Using two wood screws, attach the Panel to the Plywood Drawer Front
Step 3:Finish the Telephone Caddy - Select the Finishing Materials
- Use Wood Filler for all holes
- Complete all sanding
- Apply a minimum of three coats of poly
No comments:
Post a Comment
Through these open doors you are always welcome